The standard Windows installer refuses to install to a USB drive, and that’s on purpose. Microsoft blocks it outright, which is a problem if you want a portable, bootable Windows environment you can plug into any PC for troubleshooting or borrowed-hardware work, without installing anything on the machine’s internal drive.
The fix: Rufus, a free tool for writing bootable ISOs to USB drives, has a mode built exactly for this, called “Windows To Go”. It writes a full, runnable OS straight onto an external drive, bypassing the installer’s block entirely, and it boots on basically anything with a USB 3.0 port.
Microsoft killed the official Windows To Go feature outright in Windows 10 2004, after years of it existing only in Enterprise and Education editions to begin with. Doesn’t matter here. Rufus never relied on Microsoft’s built-in tooling for this, it builds the bootable image itself, so it still works fine on current Windows 10 and 11 ISOs.
What you need
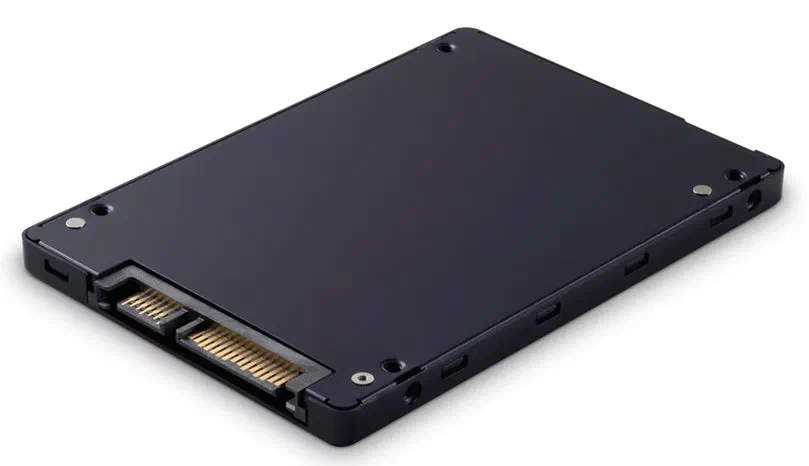
- An external SSD or an internal SSD in a USB 3.0 enclosure. SATA is plenty; 5 Gbps is more than Windows needs. Whatever’s on the drive now gets wiped, so back it up first.
- A Windows 10 or 11 ISO, official source, straight from Microsoft.
- Rufus. Grab the portable build if you don’t want to install anything.
- A host PC with a spare USB 3.0 port to test on.
Building the drive
Plug in the SSD, open Rufus, select it under Device. If it’s not in the list, that’s Rufus filtering out hard drives by default, not a dead enclosure. Expand Show advanced drive properties and check List USB Hard Drives.
Under Boot selection, pick Disk or ISO image, click SELECT, point it at your Windows ISO.
Here’s the actual trick: find the Image option dropdown and change it from Standard Windows installation to Windows To Go. Standard mode drops installer files on the drive and expects an internal disk to install onto. Windows To Go writes a complete, bootable OS straight onto the USB drive itself. That’s the whole workaround, in one dropdown.
Set the partition scheme to GPT. Use MBR only if you’re targeting something old enough to still boot legacy BIOS. Leave the file system as NTFS. Rename the volume label to something you’ll actually recognize later; I use WinToGo-SSD so I don’t grab it thinking it’s a backup drive.
Hit START. Rufus throws up a customization prompt. Take all three options:
- Remove requirement for 4GB+ RAM, Secure Boot, and TPM 2.0. You don’t control the hardware you’ll boot this on, and you don’t want Windows 11’s install-time checks blocking you on some ancient office PC.
- Prevent Windows To Go from accessing internal disks. This is the entire point of the exercise: keep the host’s internal drives untouched while you’re running off USB.
- Create a local account. Skip signing into a Microsoft account on hardware that isn’t yours.
Confirm the wipe warning and let it run. About fifteen minutes on my SSD over USB 3.0.
Booting it
Use a blue or red USB port, assuming the board still bothers color-coding them; check the manual if it doesn’t. Black ports are USB 2.0, and Windows To Go over USB 2.0 technically works, if you enjoy watching paint dry. Hit the boot menu key on the target machine (F12, F11, F8, or Del, depending on the board) and select the SSD.
First boot on a new machine is slow. Windows spends a few minutes detecting hardware and pulling in generic drivers the first time it meets an unfamiliar motherboard. Every boot after that on the same machine is fast. Don’t pull the drive halfway through this step.
Network drivers are the real gap. Every host runs different Wi-Fi and Ethernet chipsets, and a fresh image doesn’t ship with all of them. Keep a portable driver pack (3DP Net) in a folder on the drive so you’re not stuck offline right when you need to download something.
Check your enclosure supports UASP before you buy it, not after. Cheap USB-to-SATA bridges skip it, and without UASP you lose TRIM support. Your SSD gets slower the longer you use it, and there’s nothing you can do about that once you own the thing.
Why this beats a recovery USB
A recovery disk gets you a stripped-down toolset in a limited environment. This gets you actual Windows: your software, your settings, your browser bookmarks, running on hardware that isn’t yours, with nothing left behind when you’re done.